BasketCoachBasketCoach
Accueil › Fiches techniques › Le jeu à trois
FT CO 02Collectif offensif · Collectif

Le jeu à trois

Fiche technique de basket-ball : principes, placements et points clés pour l’entraîneur.

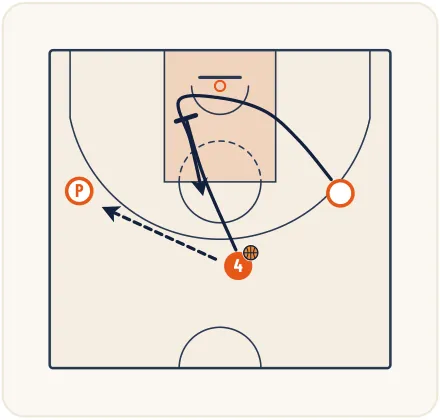
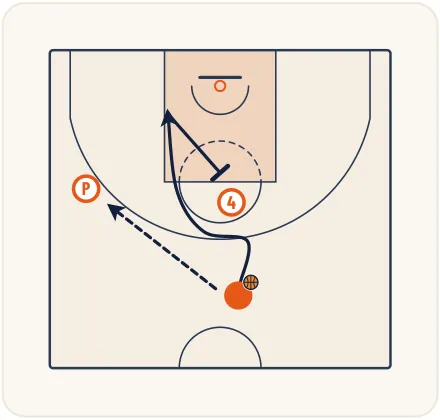
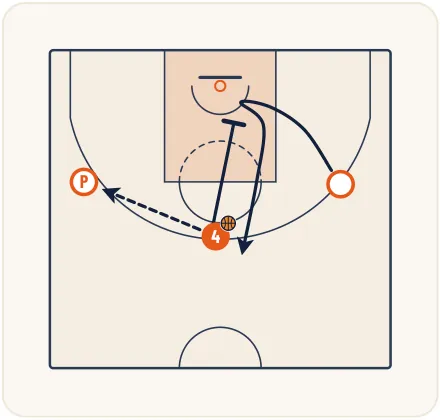
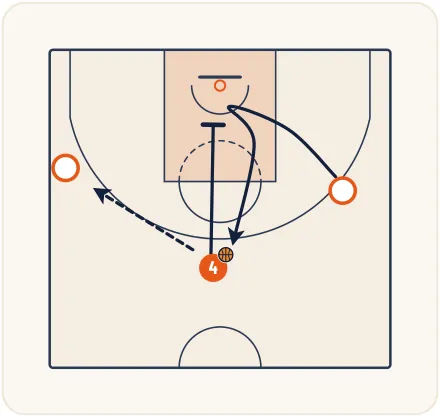
Jeu à 3 : 1 ailier, 1 poste bas côté ballon, 1 poste bas côté opposéJeu à 3 : 1 arrière, 1 ailier, 1 poste hautJeu à 3 : 1 arrière, 1 poste haut côté ballon, 1 poste bas côté opposéJeu à 3 : 2 arrières, 1 poste hautJeu à 3 : 1 arrière, 2 postes hautLes différentes situations de jeu à 2

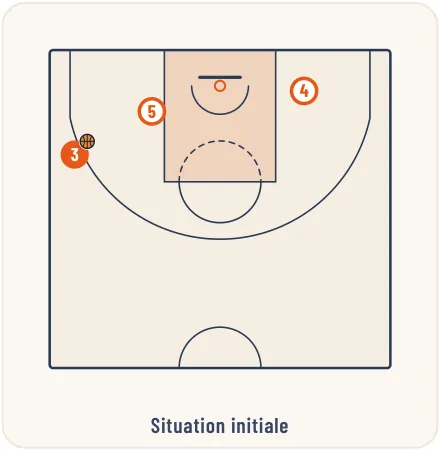
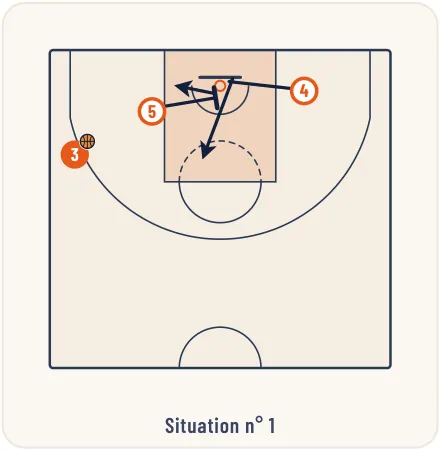
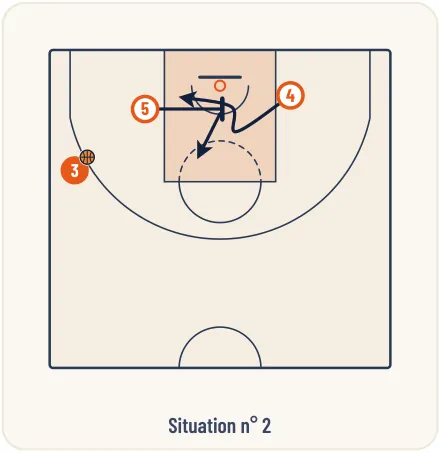
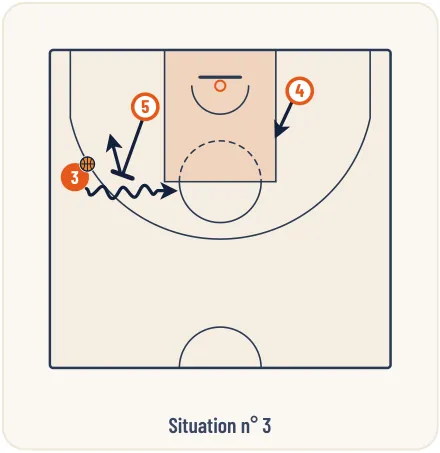
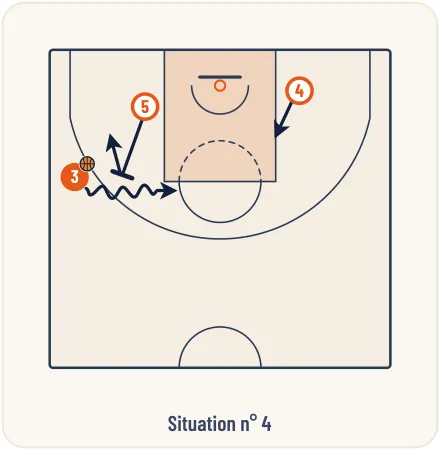
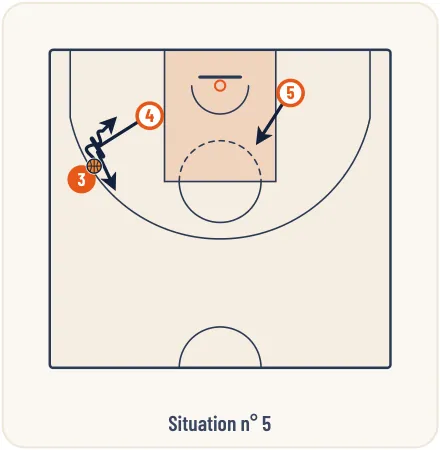
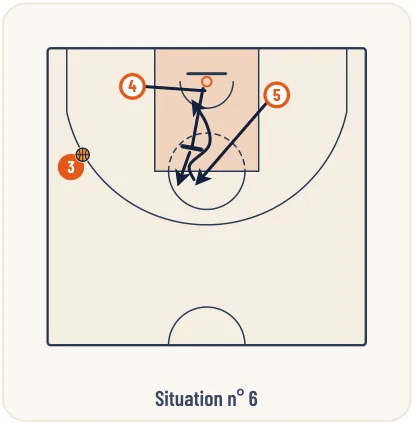
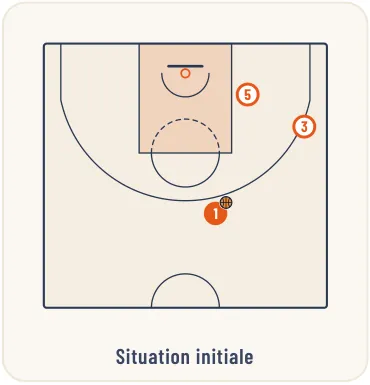
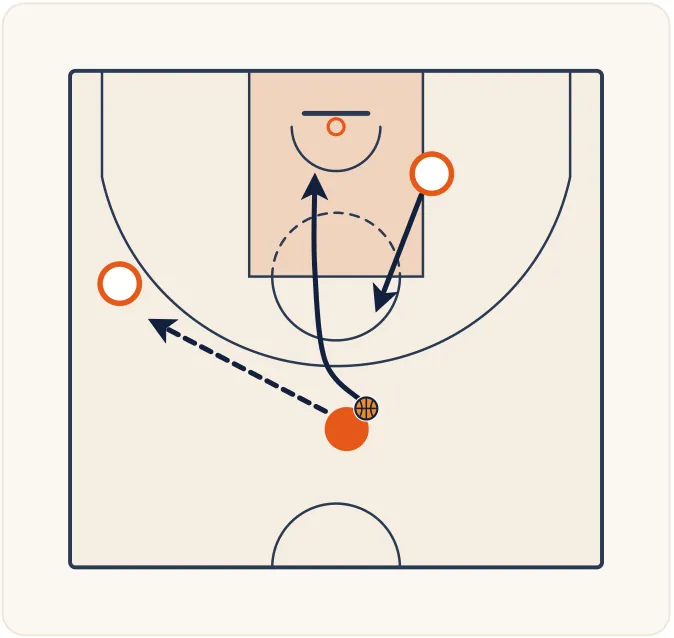
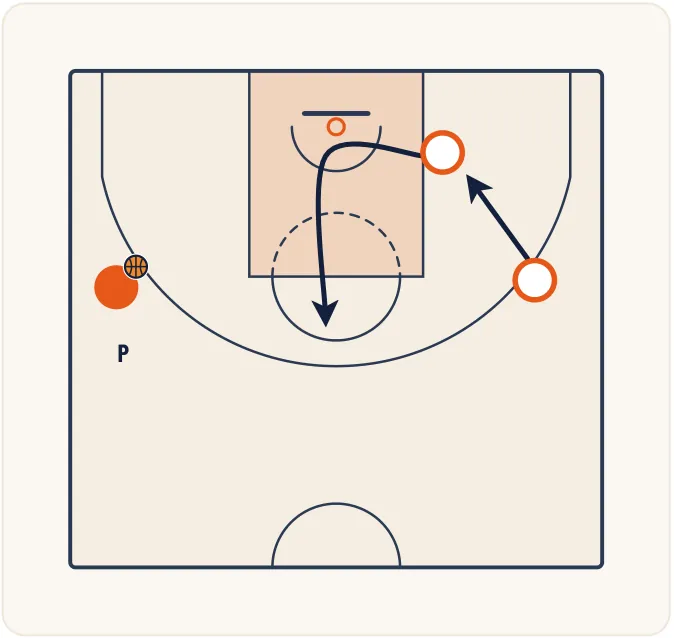
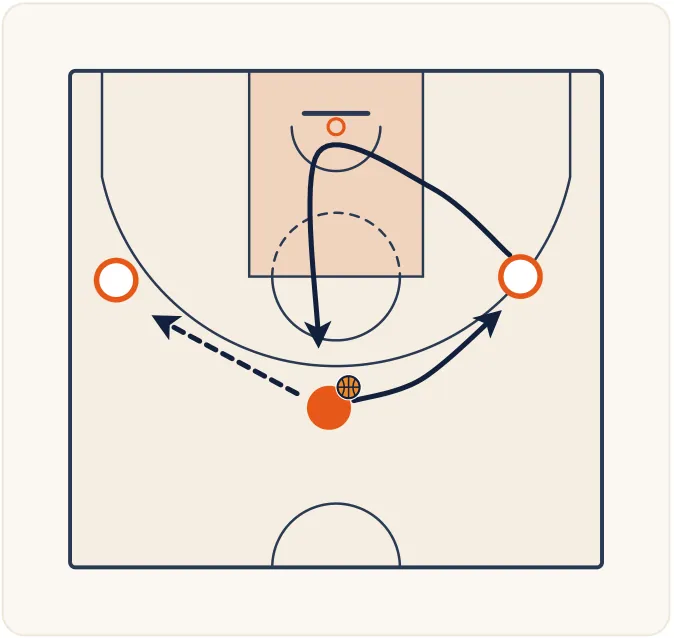
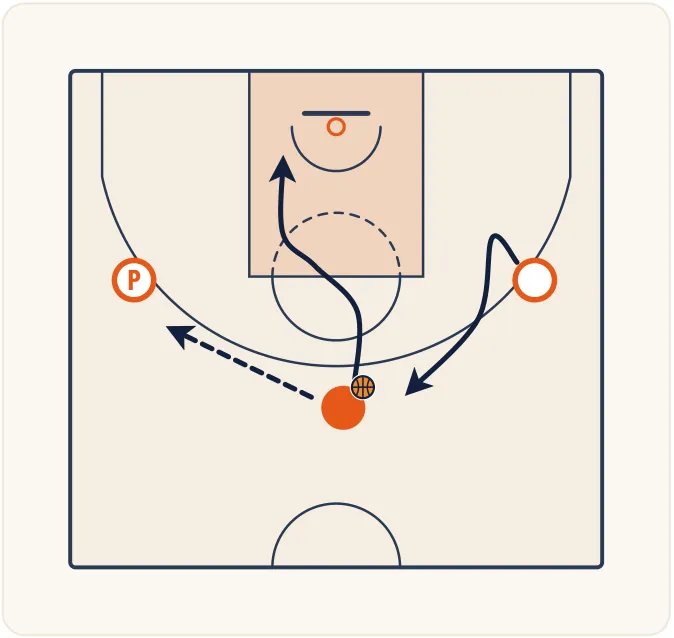
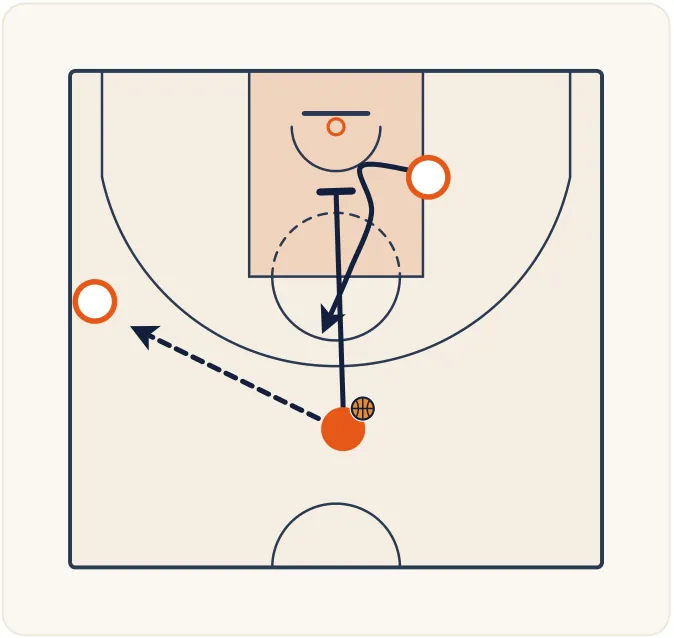
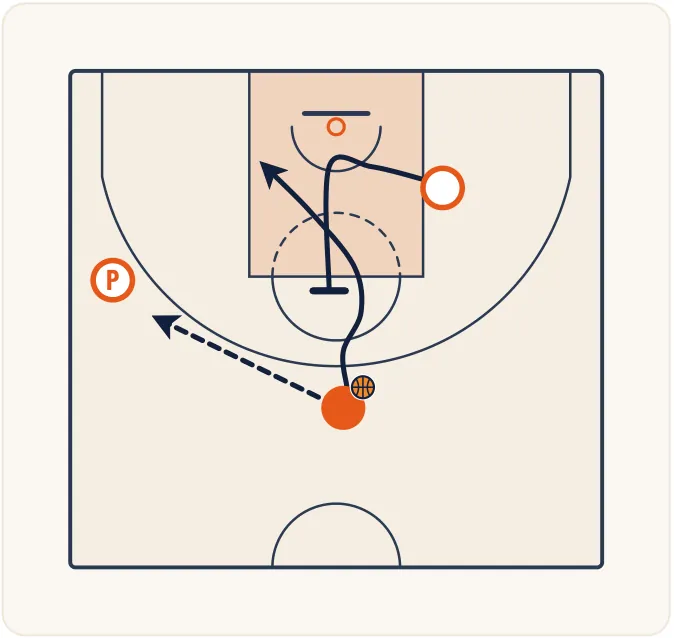
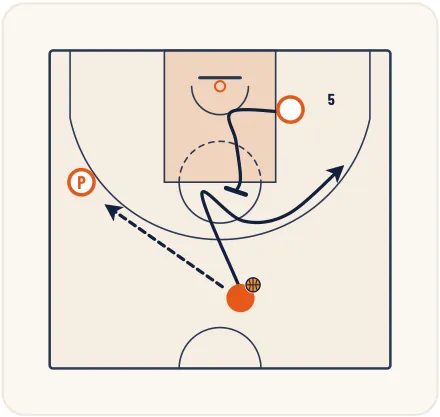
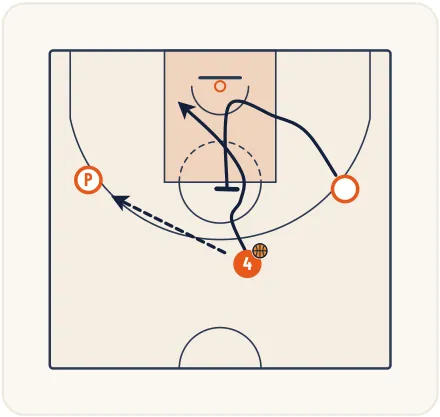
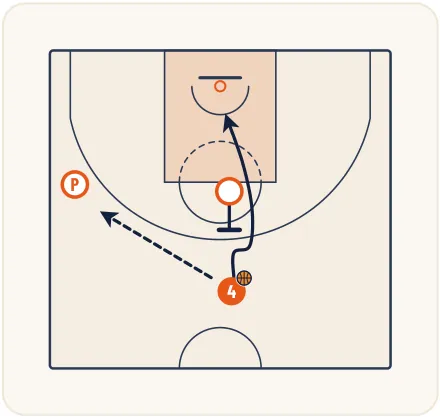
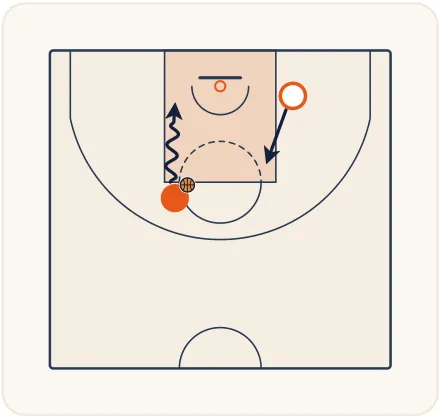
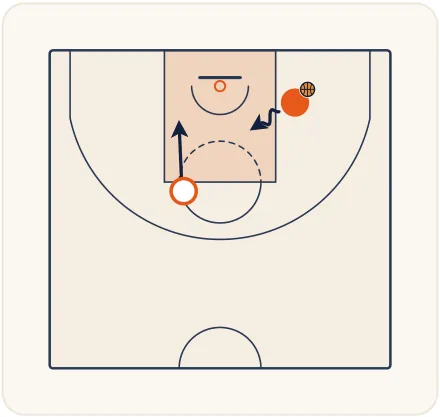
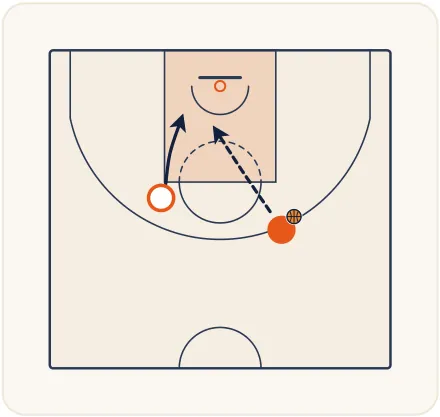
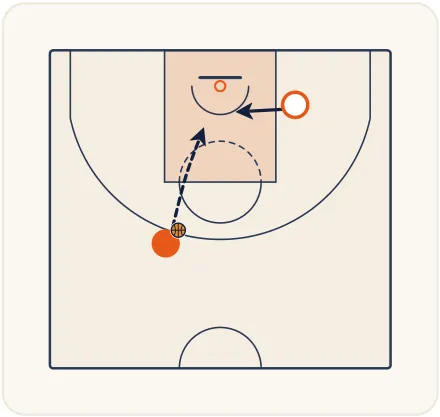
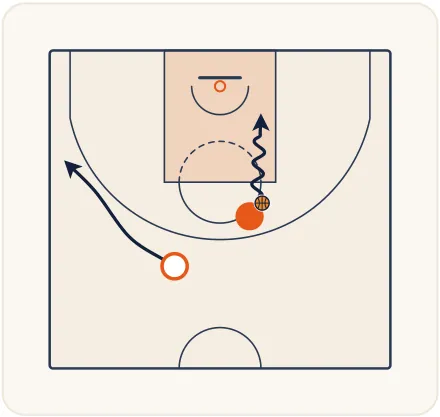
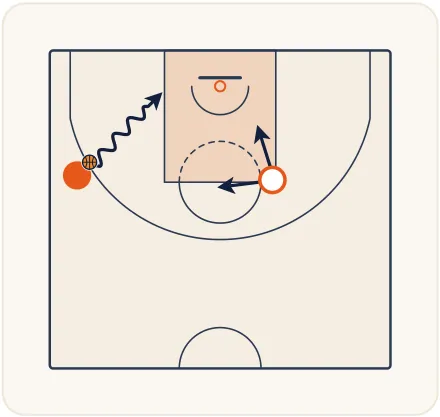
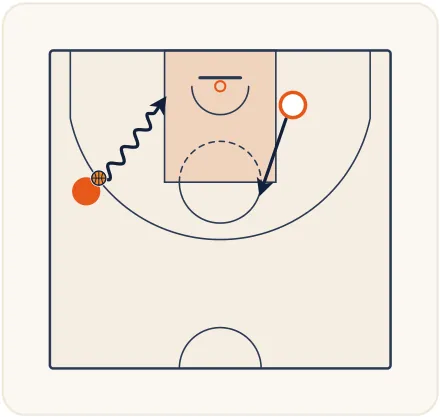
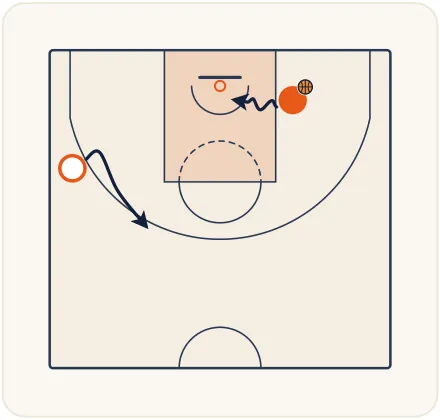
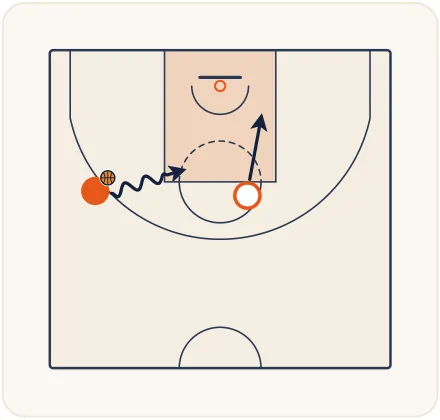
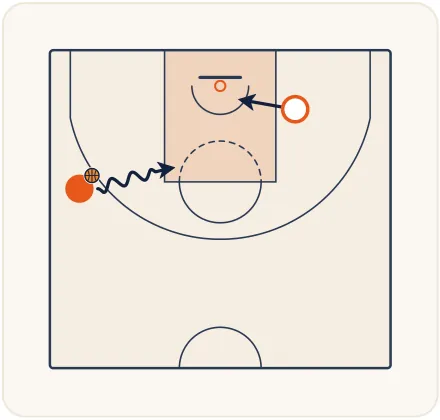
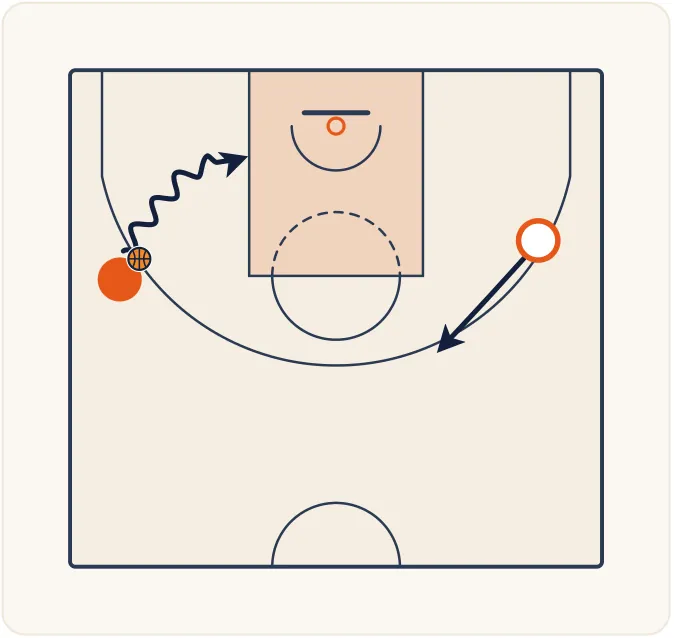
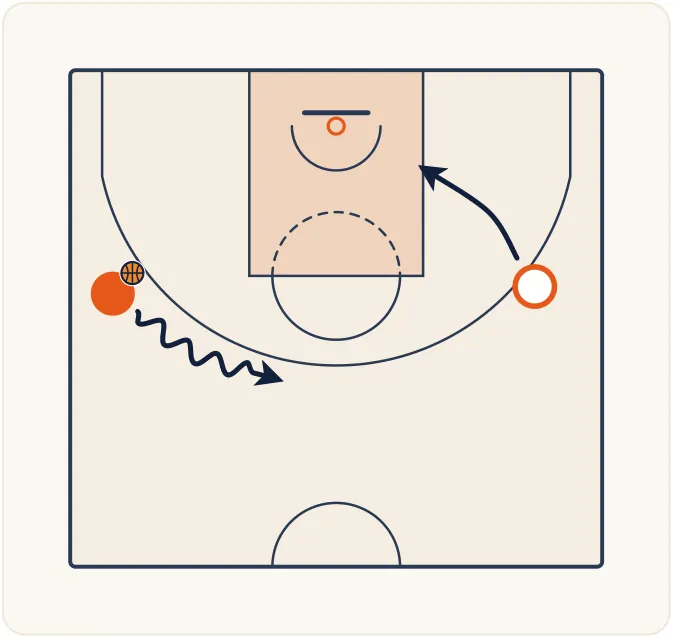
Jeu à 3 : 1 ailier, 1 poste bas côté ballon, 1 poste bas côté opposé

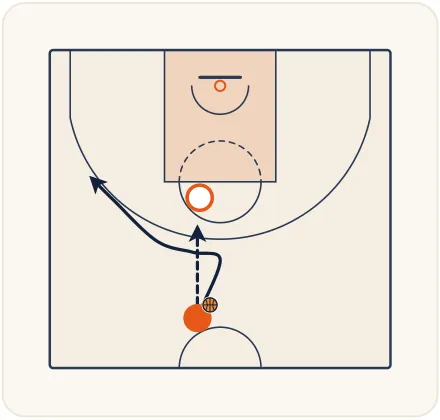
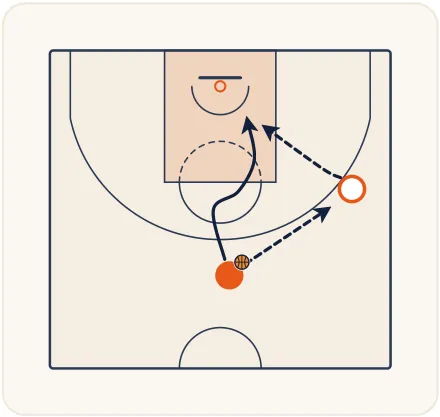
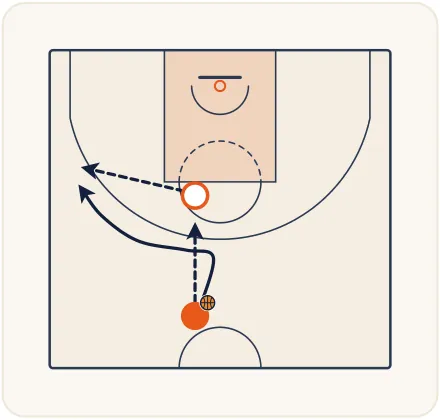
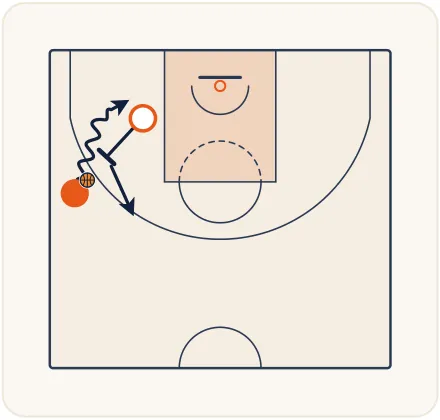
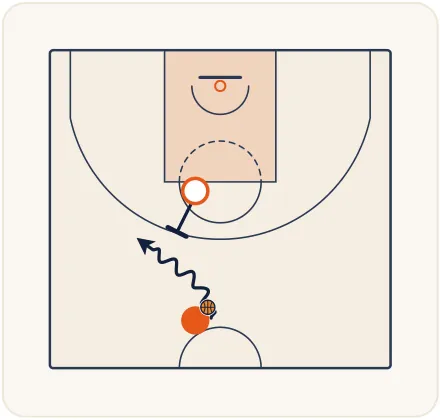
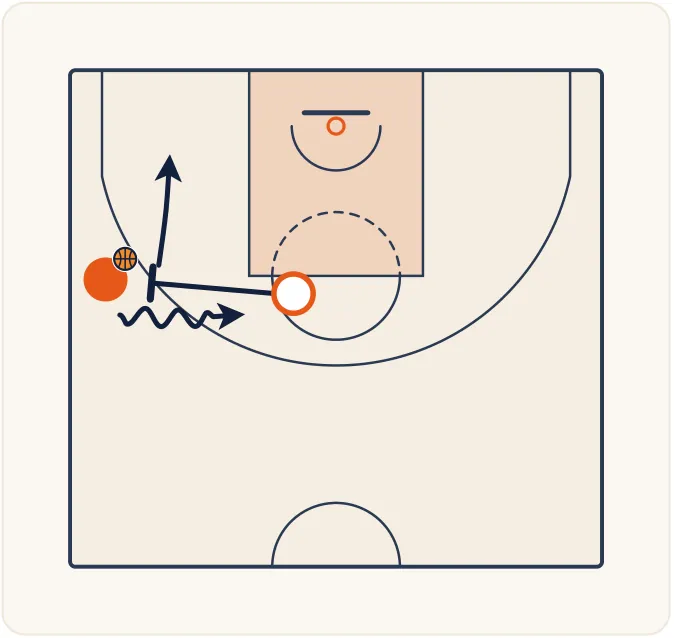
Le jeu à trois – illustration 1
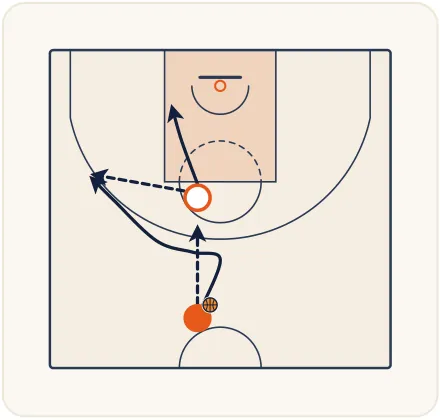
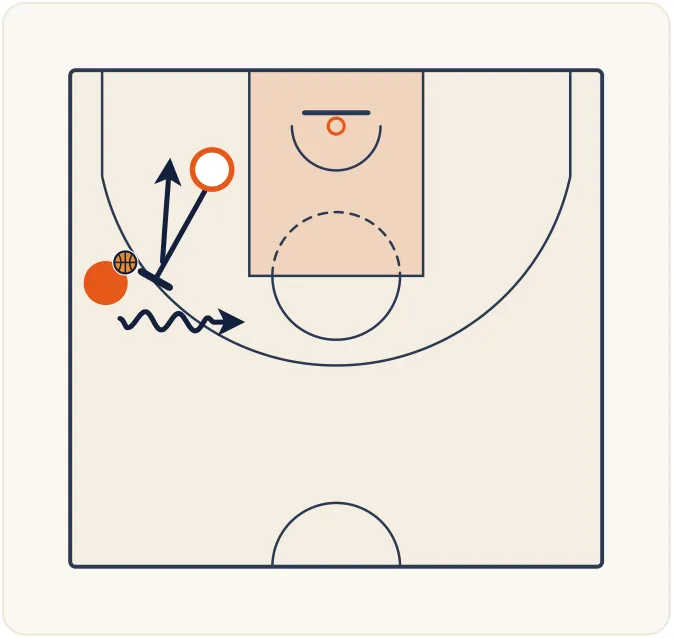
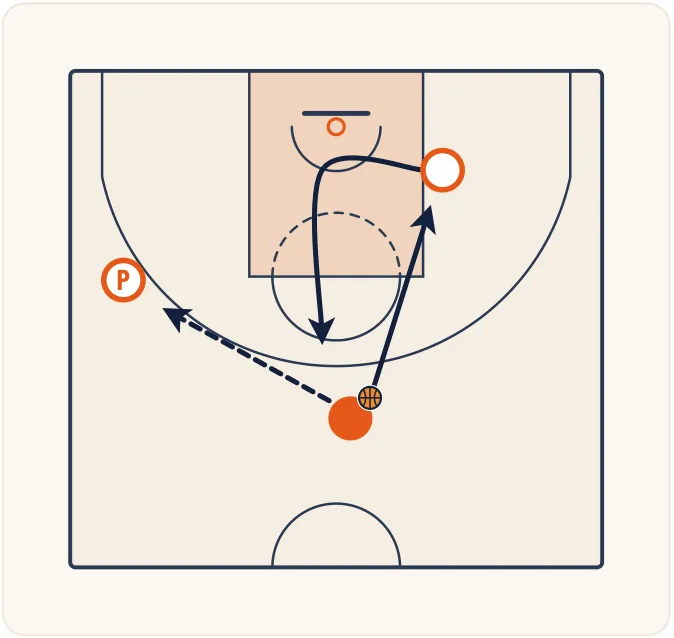
Le jeu à trois – illustration 2
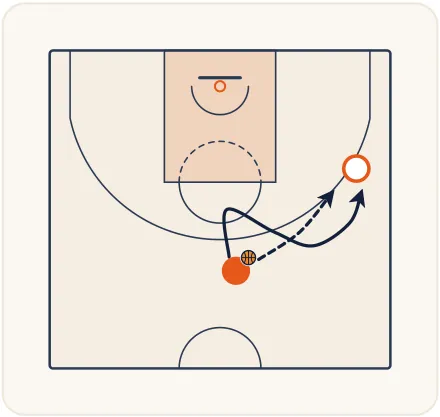
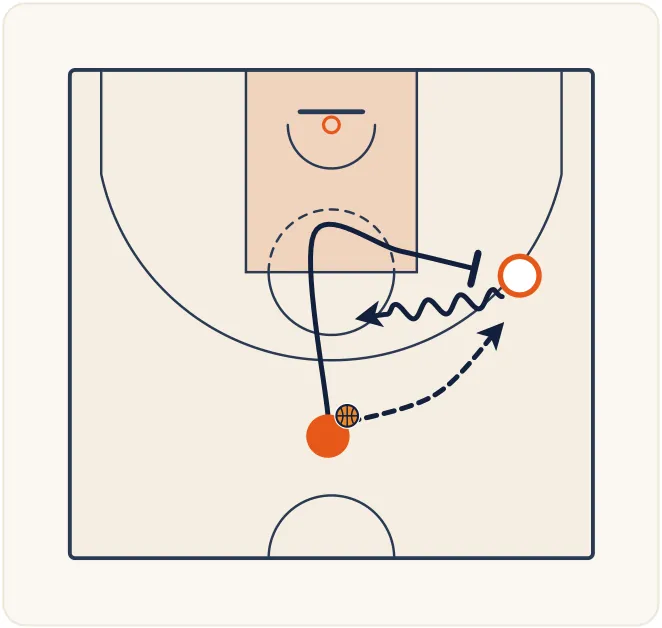
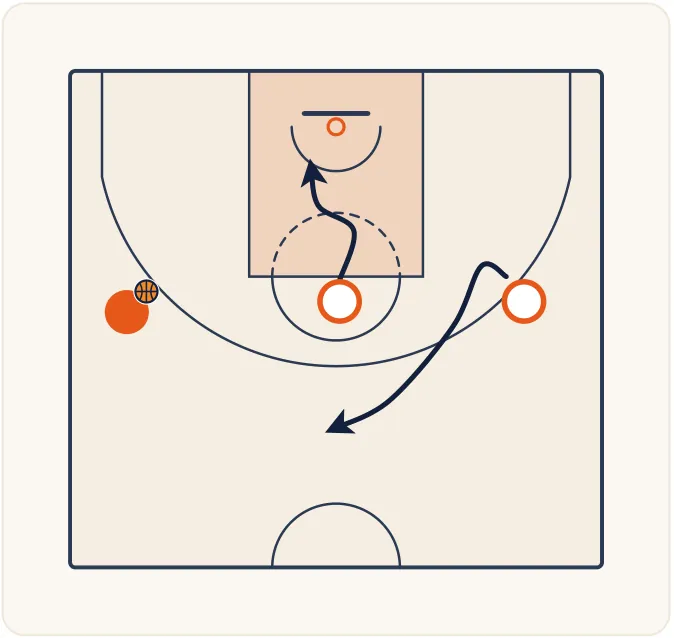
Le jeu à trois – illustration 3
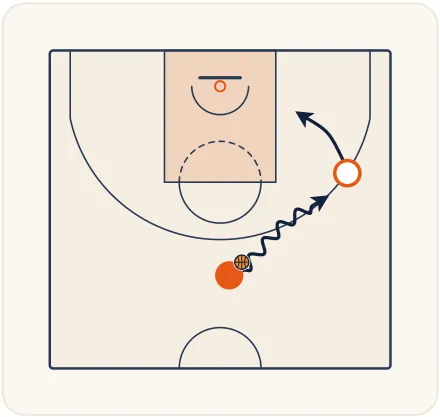
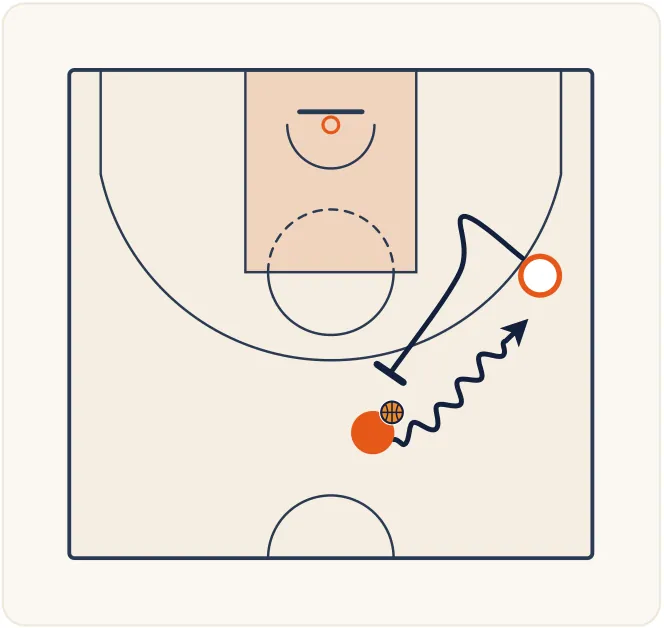
Le jeu à trois – illustration 4
Le jeu à trois – illustration 5
Le jeu à trois – illustration 6
Le jeu à trois – illustration 7

Jeu à 3 : 1 arrière, 1 ailier, 1 poste bas

Le jeu à trois – illustration 8
Le jeu à trois – illustration 9
Le jeu à trois – illustration 10
Le jeu à trois – illustration 11
Le jeu à trois – illustration 12
Le jeu à trois – illustration 13
Le jeu à trois – illustration 14
Le jeu à trois – illustration 15

Jeu à 3 : 1 arrière, 1 ailier, 1 poste haut

Le jeu à trois – illustration 16
Le jeu à trois – illustration 17
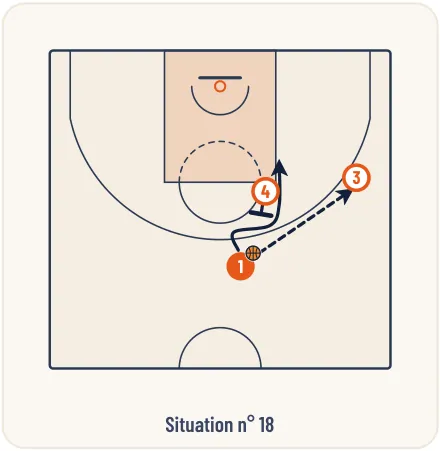
Le jeu à trois – illustration 18
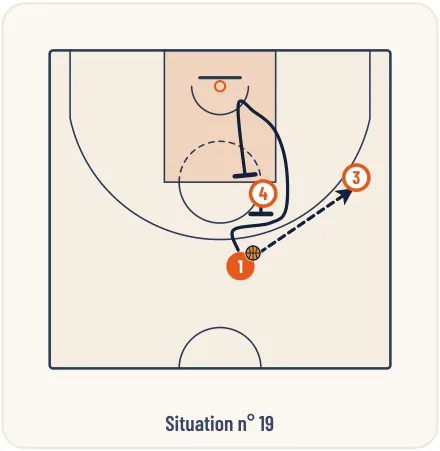
Le jeu à trois – illustration 19
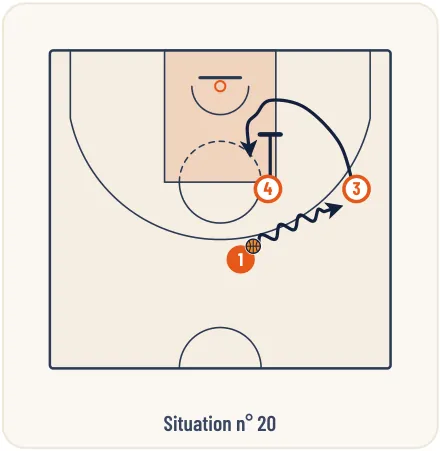
Le jeu à trois – illustration 20
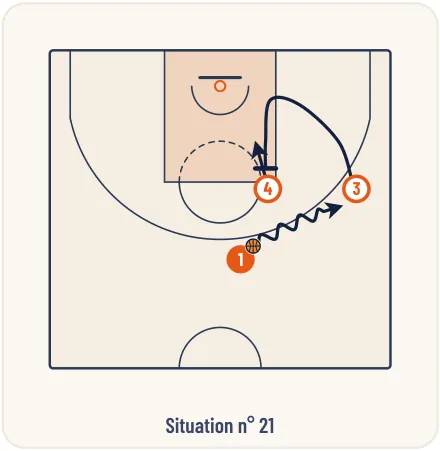
Le jeu à trois – illustration 21
Le jeu à trois – illustration 22
Le jeu à trois – illustration 23
Le jeu à trois – illustration 24

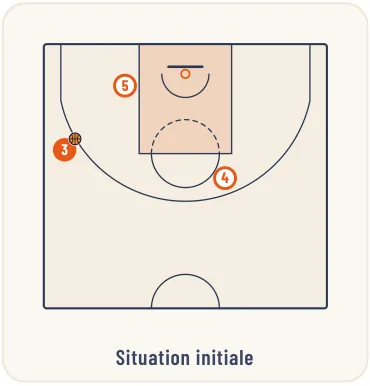
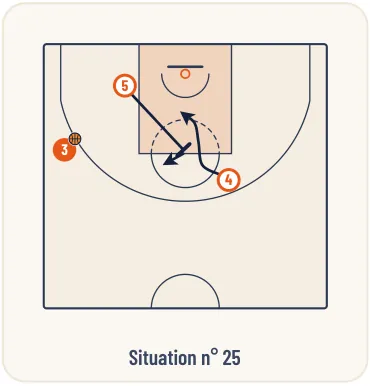
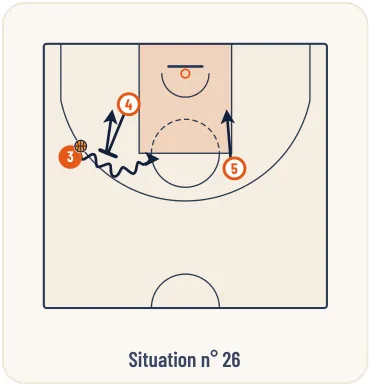
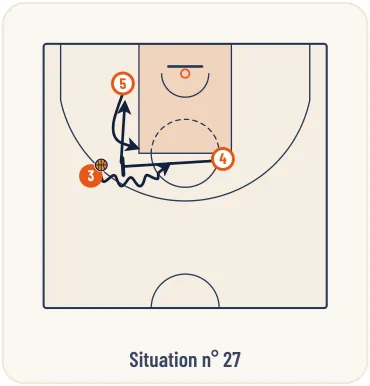
Jeu à 3 : 1 arrière, 1 poste haut côté ballon, 1 poste bas côté opposé

Le jeu à trois – illustration 25
Le jeu à trois – illustration 26
Le jeu à trois – illustration 27
Le jeu à trois – illustration 28

Jeu à 3 : 1 ailier, 1 poste bas côté ballon, 1 poste haut côté opposé

Le jeu à trois – illustration 29
Le jeu à trois – illustration 30
Le jeu à trois – illustration 31
Le jeu à trois – illustration 32
Le jeu à trois – illustration 33
Le jeu à trois – illustration 34
Le jeu à trois – illustration 35

Jeu à 3 : 2 arrières, 1 poste haut

Le jeu à trois – illustration 36
Le jeu à trois – illustration 37
Le jeu à trois – illustration 38
Le jeu à trois – illustration 39
Le jeu à trois – illustration 40

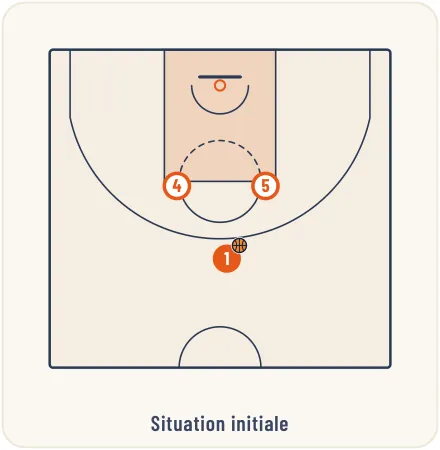
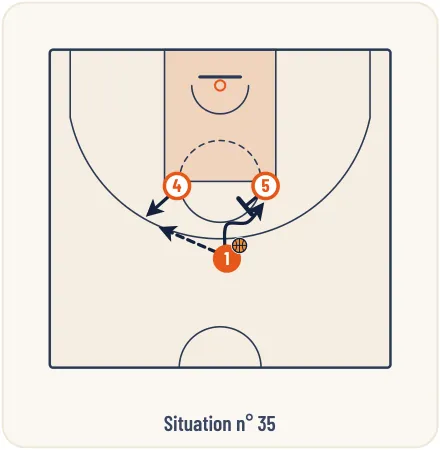
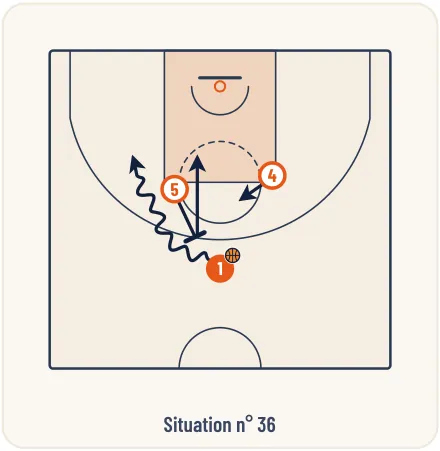
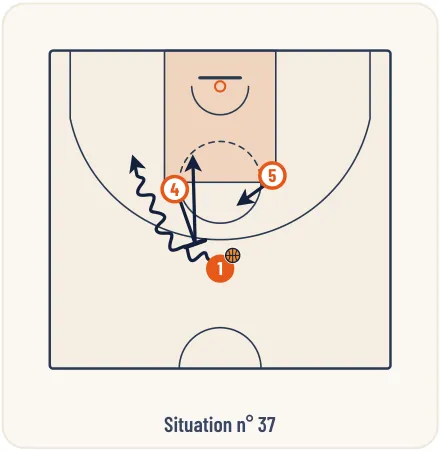
Jeu à 3 : 1 arrière, 2 postes haut

Le jeu à trois – illustration 41
Le jeu à trois – illustration 42
Le jeu à trois – illustration 43
Le jeu à trois – illustration 44
Le jeu à trois – illustration 45

Les différentes situations de jeu à 2

Jeu à 2 côté ballon sans écran — Relation intérieur-intérieur

Le jeu à trois – illustration 46
Le jeu à trois – illustration 47

Jeu à 2 côté ballon sans écran — Relation extérieur-intérieur

Le jeu à trois – illustration 48
Le jeu à trois – illustration 49
Le jeu à trois – illustration 50

Jeu à 2 côté ballon sans écran — Relation extérieur-extérieur

Le jeu à trois – illustration 51
Le jeu à trois – illustration 52
Le jeu à trois – illustration 53

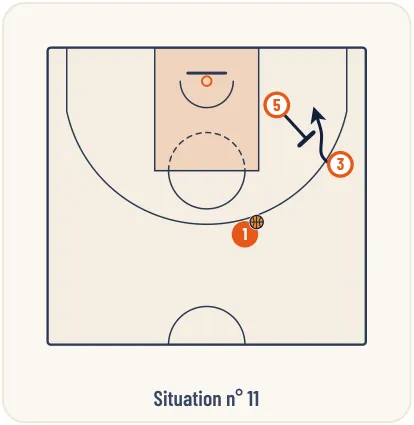
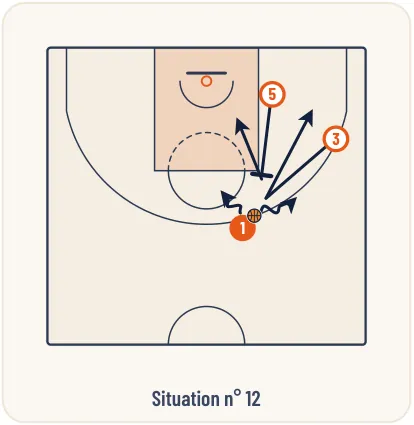
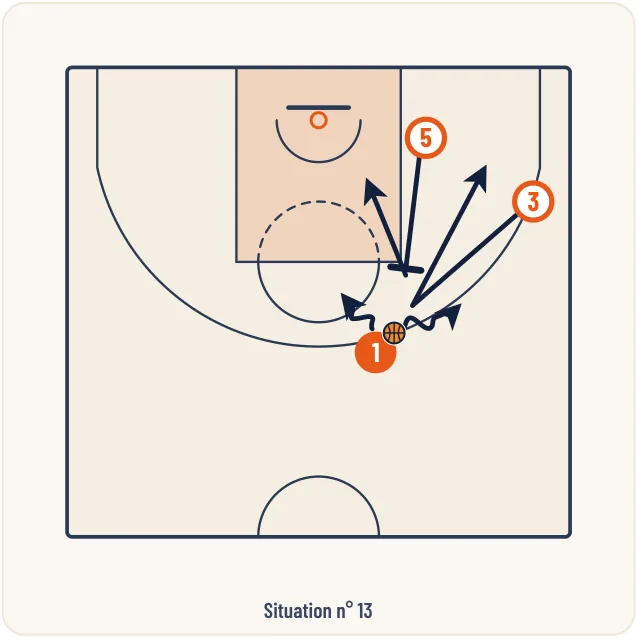
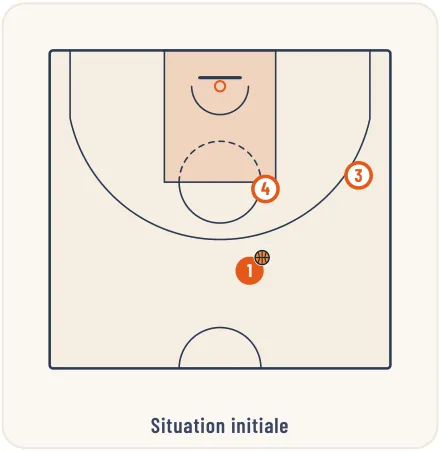
Jeu à 2 côté ballon avec écran — Relation extérieur-intérieur

Le jeu à trois – illustration 54
Le jeu à trois – illustration 55
Le jeu à trois – illustration 56

Jeu à 2 côté ballon avec écran — Relation extérieur-intérieur (suite)

Le jeu à trois – illustration 57
Le jeu à trois – illustration 58

Jeu à 2 côté ballon avec écran — Relation extérieur-extérieur

Le jeu à trois – illustration 59
Le jeu à trois – illustration 60
REMARQUE

Nous considérerons qu’il n’existe pas de situations réalistes dans le cas d’un jeu à 2 côté ballon avec écran entre 2 joueurs intérieurs.

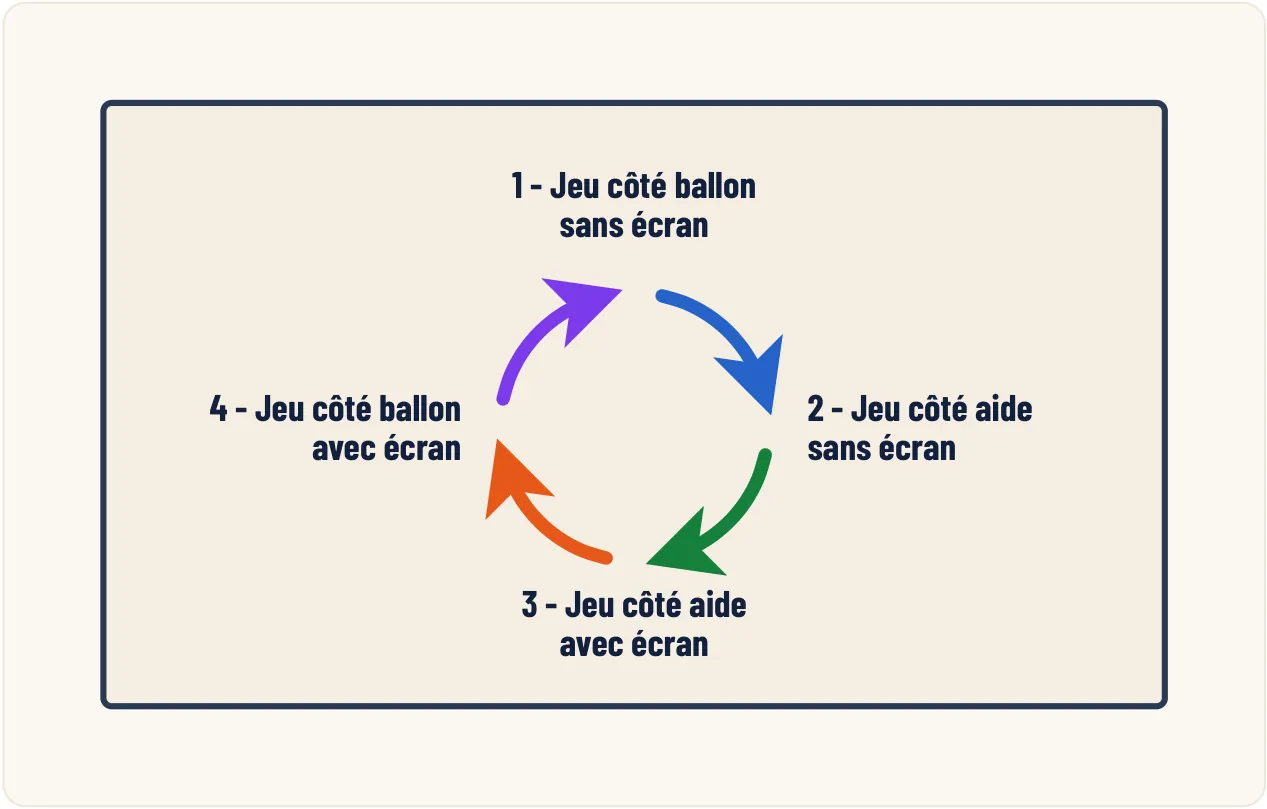
Proposition d’une progression dans l’apprentissage du jeu à 2

Le jeu à trois – illustration 61

Jeu à 2 côté aide sans écran — Relation intérieur-intérieur

Le jeu à trois – illustration 62
Le jeu à trois – illustration 63

Jeu à 2 côté aide sans écran — Relation extérieur-intérieur

Le jeu à trois – illustration 64
Le jeu à trois – illustration 65

Jeu à 2 côté aide sans écran — Relation extérieur-extérieur

Le jeu à trois – illustration 66
Le jeu à trois – illustration 67

Jeu à 2 côté aide avec écran — Relation intérieur-intérieur

Le jeu à trois – illustration 68
Le jeu à trois – illustration 69

Jeu à 2 côté aide avec écran — Relation extérieur-intérieur

Le jeu à trois – illustration 70
Le jeu à trois – illustration 71
Le jeu à trois – illustration 72

Jeu à 2 côté aide avec écran — Relation extérieur-intérieur (suite)

Le jeu à trois – illustration 73
Le jeu à trois – illustration 74
Le jeu à trois – illustration 75

Jeu à 2 côté aide avec écran — Relation extérieur-extérieur

Le jeu à trois – illustration 76
Le jeu à trois – illustration 77
Le jeu à trois – illustration 78

Jeu à 2 côté ballon – côté aide — Relation intérieur-intérieur

Le jeu à trois – illustration 79
Le jeu à trois – illustration 80
Le jeu à trois – illustration 81

Jeu à 2 côté ballon – côté aide — Relation intérieur-intérieur (suite)

Le jeu à trois – illustration 82
Le jeu à trois – illustration 83
Le jeu à trois – illustration 84

Jeu à 2 côté ballon – côté aide — Relation extérieur-intérieur

Le jeu à trois – illustration 85
Le jeu à trois – illustration 86
Le jeu à trois – illustration 87

Jeu à 2 côté ballon – côté aide — Relation extérieur-intérieur (suite)

Le jeu à trois – illustration 88
Le jeu à trois – illustration 89
Le jeu à trois – illustration 90

Jeu à 2 côté ballon – côté aide — Relation extérieur-extérieur

Le jeu à trois – illustration 91
Le jeu à trois – illustration 92

Préparez votre séanceLisez la fiche page par page, avec les vidéos liées et les gammes d’exercices.

Lire dans BasketCoachMa séance